The look of watercolor, the ease of stamping!
Leave a reply

Happy Friday! I hope your week has been lovely! (tehehehe) It has been a fun filled week with the Lovely paper packet, don’t you think?
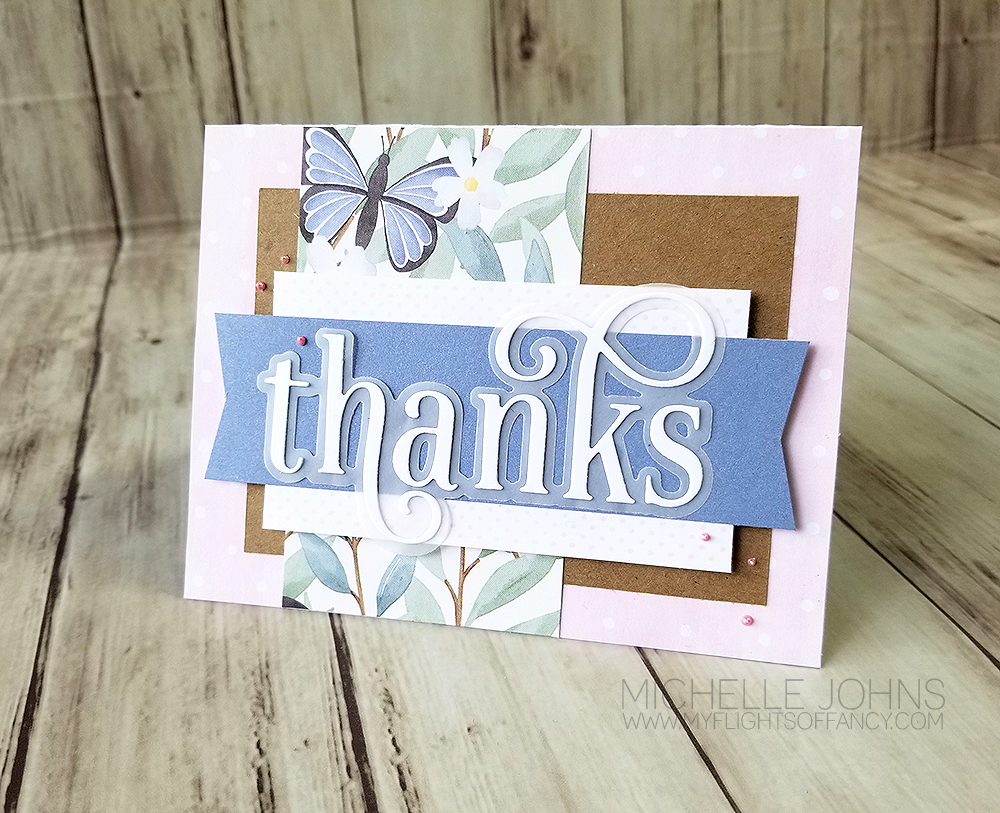
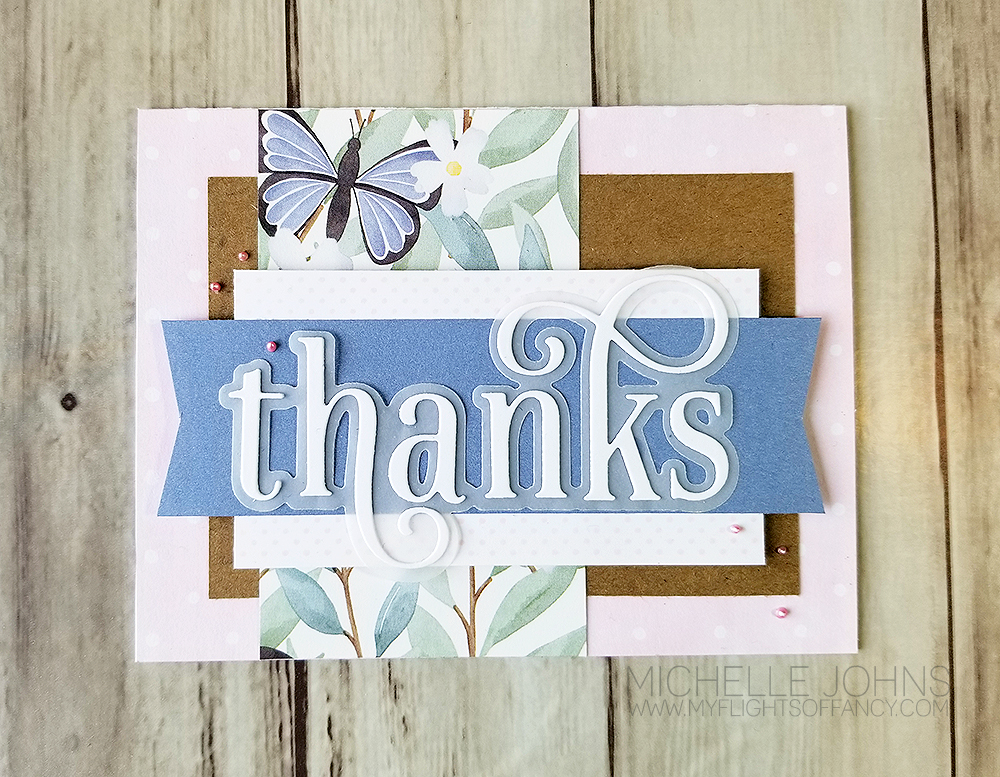
This card was partly made from leftover pieces from my desk! The Thanks die cuts were from a card that I was going to do a video on, and life got in the way! The Kraft paper and white daisy were smaller pieces on my desk as well. It’s awesome to be able to use other layers to strategically hide things!
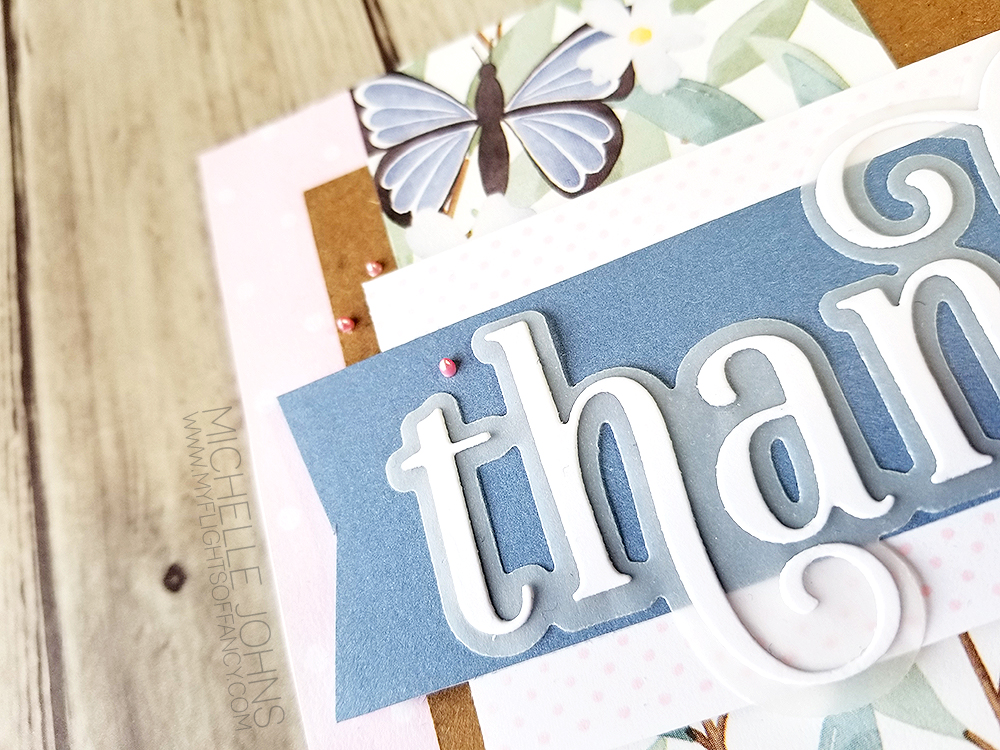
I know it’s somewhat hard to see, but there are ballerina stamped dots above and below the blue belle banner. Add some ballerina liquid pearls, and it just tops off the card! I did a row of those same dots on the inside of the card.
I hope you have enjoyed all of the projects made with the Lovely Paper Packet this week! I would love to hear what you have thought of everything!
Thanks for stopping by!

It’s time for another challenge over at H2H! This week’s challenge is “Thankful”. You can take that to mean whatever you would like. I decided to go with a Thank you card.

I had a ton of fun using the card guide for the new Serenity cardmaking workshop with the Lovely Paper Packet! I LOOOOOVE that the guides are perfect not only for the paper that they are shown with, but also with other papers as well! This uses the pattern for card 3. Isn’t it so pretty with the Lovely paper??
I used the Thanks thin cuts for the sentiment. Vellum was the perfect shadow background! Then I used two layers of white daisy and topped it all off with the White Opal Liquid Pearls! I’m not quite as good at using them for that as some other big named people out there, but the card turned out SOOOOO fun!!

This card went together really fairly quickly! The patterned papers are the front and back of one sheet! I could easily get 4 cards out of it! If you haven’t yet, pull out an older card-making workshop’s instructions, and use them for a different paper pack! I bet you will LOVE how they turn out!
Items used today:
Thanks so much for stopping by! I hope you go and play along with the H2H challenge this week! You have a whole month to play along!
Until next time, keep crafty my friends!
At least I’m not Gizmo! That would be bad! (though, it would fit right in with how 2020 is going, right?)
So, I decided I was going to add some water to my ink! So I grabbed a piece of acetate and picked a paper, and then chose an ink. Believe it or not, both of these cards were done with the same ink color, and that was fern!
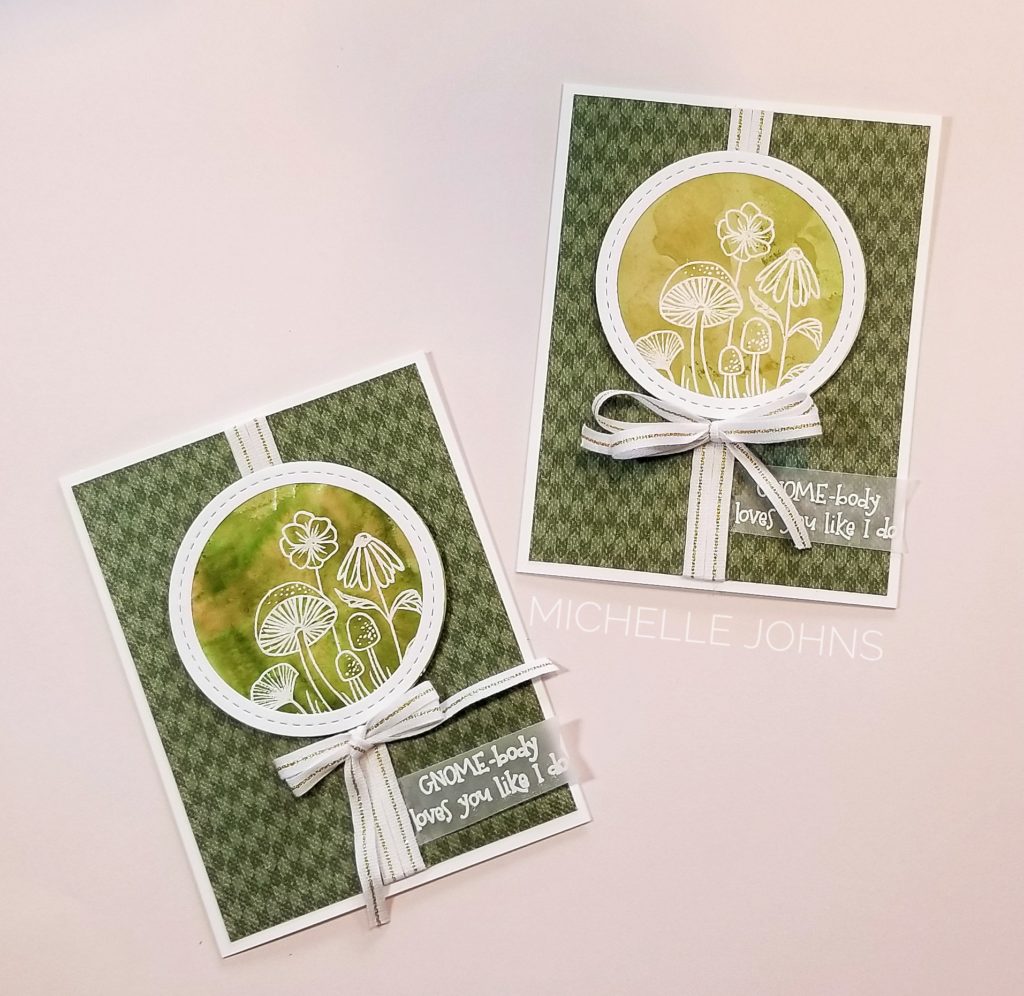
So, let’s walk through the steps, shall we?
So, first I grabbed a couple of pieces of white daisy cardstock, and used some versamark ink and stamped the little mushroom scene from the Gnome Matter stamp set. (LOVE that set!) and embossed with some white powder. Then I put some fern ink directly onto some acetate and grabbed a water brush, added some water, and then swirled it around. I then smooshed the ink and water mix onto the paper with the embossing. I dabbed it a few times, then did some heat setting. Then, a bit more ink and a smidge more water, mixed, and smooshed again some more! Then a bit more drying and the first one was done.
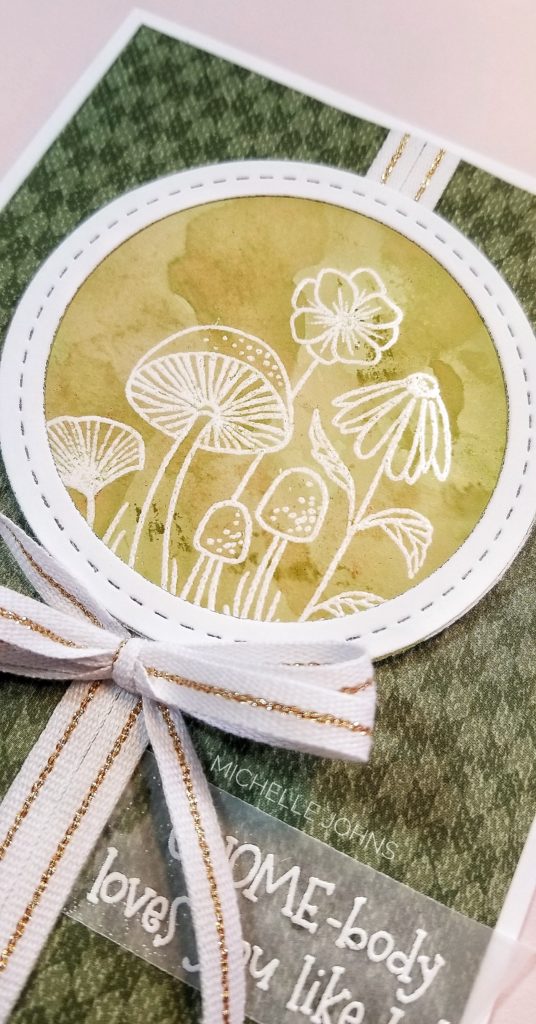
I decided to see what would happen if I put some ink on the back side of the paper, directly, and then added some water from behind. It gave a completely different result! But, still so fun!
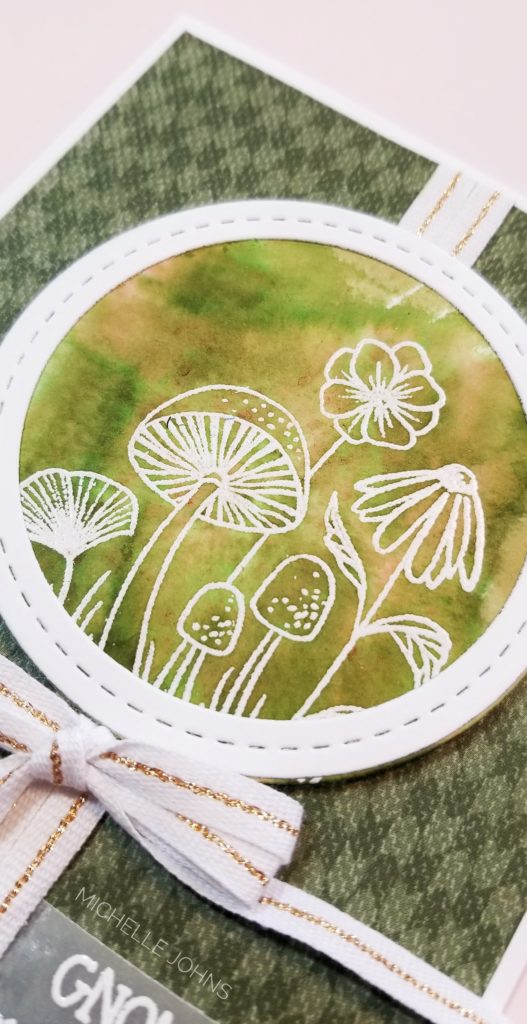
I ended up getting more browns from my inks than I expected! A bit of red, too!
So, to finish the card, I cut the circle out with the solid circle from the shaker window and confetti die set. I cut the frame from that set from white daisy cardstock. I used the B&T from the Mix In paper pack. I stamped a sentiment from the set on vellum with the versamark and white embossing powder. I lined the B&T with two rows of the white and gold ribbon (retired and sold out!), then popped up the circle with some foam tape. Then I tied a double bow, and attached it with a mini glue dot.
The cards were so simple and easy to do! Super fun, and no two cards will be the same!!
Now, make sure to hop over to the H2H blog and see the other inspiration and link up your project too!
See you again soon!!
Do you remember the choose your own adventure books from when you were a kid? I always loved them. Sometimes I would cheat, but not always! LOL Well, today Danielle & I have a “choose your own adventure” type of layout, again! So, we chose this page as our inspo page. The thinking is, you could use any 4 blocks either together, or not, to create your own little mini layout page. You could do it as one single page or you could do it as one of the 3×4 page protector pages.
I chose to use the 3×4 page protector, and go from there. I don’t know if I told you my theory last week (I could go back and check, but who has time for that??), but that I had decided that I was going to try to create a mini album for the trip that Hubs and I went to NYC on. So, I am going to use all of the prompts, and I will have a finished book (and probably more than one) by the end of the year! I think I will get some journaling throughout the process from hubs too, so that it isn’t just “my” book. I will have to incorporate some pics from him, too! (yaay! more pages!) LOL

So, I started with stamping the city scape from the “Fly-by Greetings” stamp set in intense black ink. It just screams NYC to me! Then I colored it with the tri-tip markers. I didn’t get the banner ropes quite masked off, but I still am very happy with it! (excuse the cat hair! I didn’t notice until after I posted!)

Then I needed the pocket for the top right, that will hold a 2×2 photo on top, then I can put some journaling on the little tag. I did cut the page protector so that the tag will pop out easily! I used a little 1/8″ punch for the hole and a bit of mink twine.
The bottom right will be for a photo that is either 3×4, or maybe slightly smaller, so that I can have the white border.

Then, the bottom left is a little pocket card. You can see the blue/white circles (it’s the same paper from the last page!) sticks out over the photo spot. It’s tucked in a vellum pocket! I know you can’t tell very well just yet, but when the journaling/photos are on there, you will be able to see the difference! The heart stamp is from the Love These People stamp set! I thought it fit perfectly!

I am so happy with how this turned out! (Even if I did have to remake the vellum pocket and tag, because I didn’t pay attention to how my page protector was laid out…) I hope you like it too, and that you are a bit inspired by it! Make sure to hop over to Danielle’s blog to see what she came up with! (A little birdie told me she used the same stamp set that I did!)
CTMH Items used:
White Daisy Cardstock
Mix In paper packet
Vellum
Fly-by Greetings Stamp Set
Love These People Stamp Set
Intense Black Ink
Spectrum Noir Tri-Tip Markers
Raspberry Ink
Stitched Rectangle Thin Cuts
Mink Twine
Foam Tape
Non stick Micro-tip Scissors
Paper Trimmer
I know I love pockets, and it stresses me out when I don’t have pockets! (one of my new pairs of jeans don’t have front pockets! WHAT??) Anyway, Danielle found a super cute little pocket box that someone created with dies. We don’t have those dies, so she asked me to create a cricut file for it. So, I did! You can find that file here.

This cute little pocket box/bag thing is adorable! (Even if I do say so myself!) I decided to fit a set of 4 little cards in it! These cards are 3×4 and the envelopes are just slightly larger.

I left the front of the pocket box blank, so it could be reused after the cards are gone (if wanted). The cards themselves are all the same, with the exception of the paper on the front. I used the 2nd largest circle die cut for the vellum, and the banner from the Spruced Up Cardmaking Workshop kit. (I am LOVING all of the uses I have found for these stamps and dies!) I made sure to put a panel of white on the inside of the cards (not photographed), so that a special pen wouldn’t be needed for the notes. The “Way to Go” comes from the Say it in Style stamp set, and I slightly curved the sentiment to fit on the wavy banner.

These cards were SUPER fast to put together! The box is not quite perfect, but it’s close enough! 😉 If for some reason your machine doesn’t score well (like mine) The plain strip is scored in half, length wise. And the piece with the triangles cut out, if you just line up the points of the triangle, and score, you will be good! (You can score between the triangles, however, it will naturally fold at that point. Just make sure to do that before you start gluing things together!

I hope you like this fun project! I would love to see your little pocket box! Now, if you haven’t already been, hop over to Danielle’s blog and see her little pocket box!
Hey there, Crafty Friends!
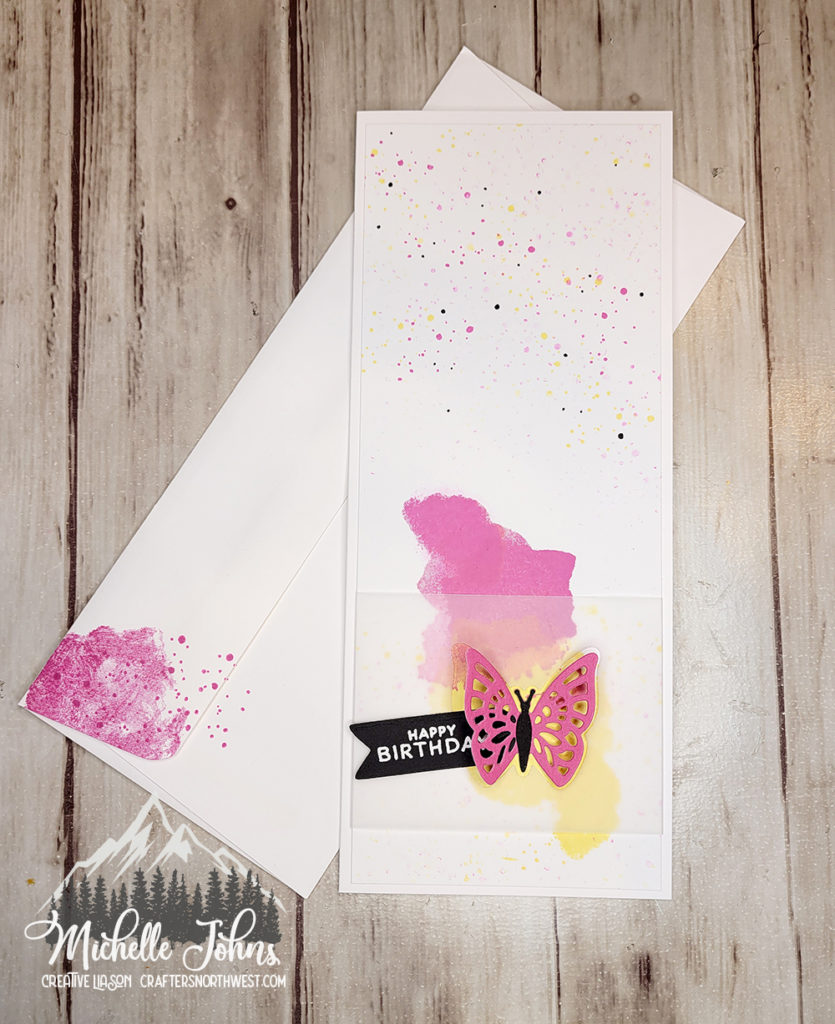
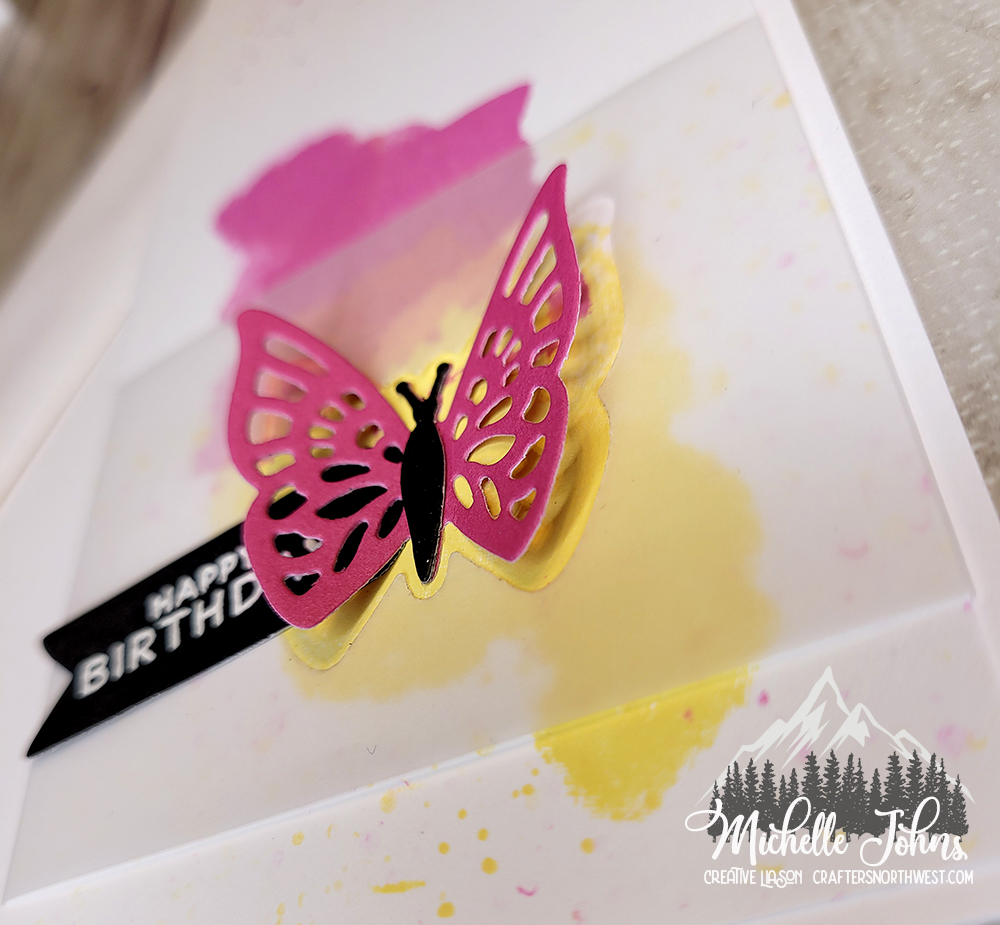
Danielle and I are back with another fun project! Today’s project is a card, but not just any card! Today we are using this card as our inspiration. We wanted to be inspired by the design, the water coloring, and the vellum!
Originally I was going to do a BUNCH of different cards to show off different water color techniques, but I left most of the products for those other techniques at home! ACK! So, I went with the “easy” option! Also called faux watercoloring! To do this, you use your ink pad, a slick surface (I used the All Purpose mat), a brush (I used the medium flat waterbrush, and some water.

Now, the papers on the left side of my cards are both retired. I used a zip strip from Craft On, on the pink card, and the cardboard piece of B&T from Hawthorne on the brown card. My ink colors today were raspberry and toffee.
Ideally you would do this on watercolor paper, however, I also didn’t have any of that with me! (Yes, I forgot a whole bag of items when I left for my crop!) So, I just used some white daisy cardstock. While it did warp some, it didn’t warp too much!) I used the Shaker window and confetti thin cuts to die cut my circle from vellum paper. Then I used two different (retired) embossing folders to emboss the circles. I created two (actually four, but I only used two) versions of “thanks” and cut them with my cricut machine. I used a bit of gold embellishing thread and gold glitter paper on the pink card, to help it pop some more. I added a few black dots from the Black & White dots. and decided I needed a bit more black. So, I grabbed the black watercolor pencil, scribbled a bit on a scrap of paper, added a bit of water with the small round water brush, and smacked it on my scissors to get some splashes of color on the rest of the card front.
I think they look pretty fantastic, even if they don’t look like the one that inspired us! I would love to see the cards you make! So, make some, snap a photo, and share with Danielle and I!
Thanks so much for stopping by! Make sure to hop over to Danielle’s blog to see her card too!
Welcome to this month’s SOTM blog hop! I know you will get a lot of inspiration from everyone! Today you should have arrived from Ronda’s blog. If not, thats ok, its a circle, and you will get back to her!
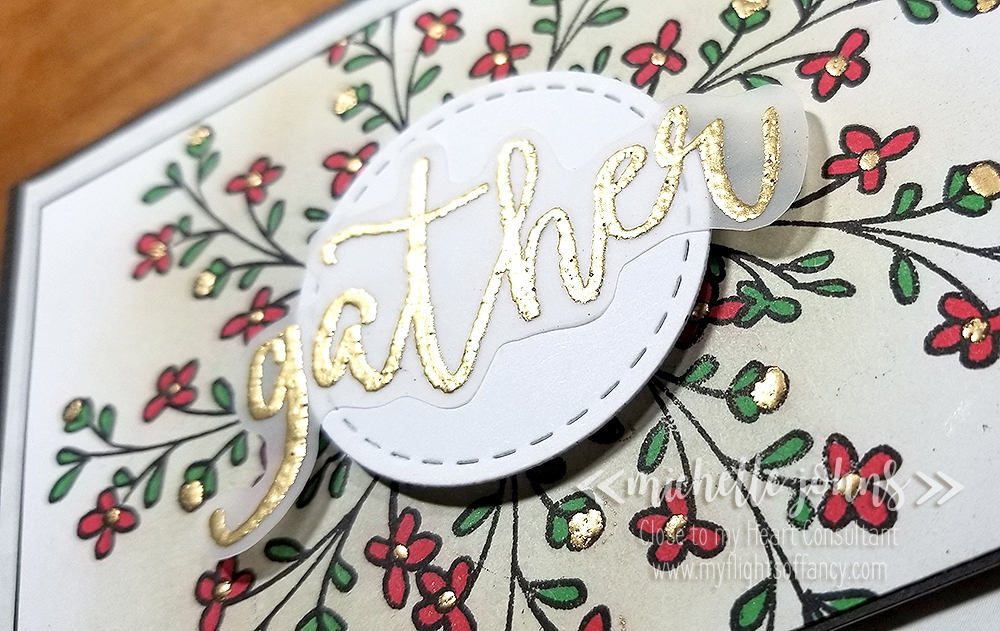
I try to find things to do with the stamp sets that are a bit different than what other people might do. Today I have this fun wreath type look for my card.
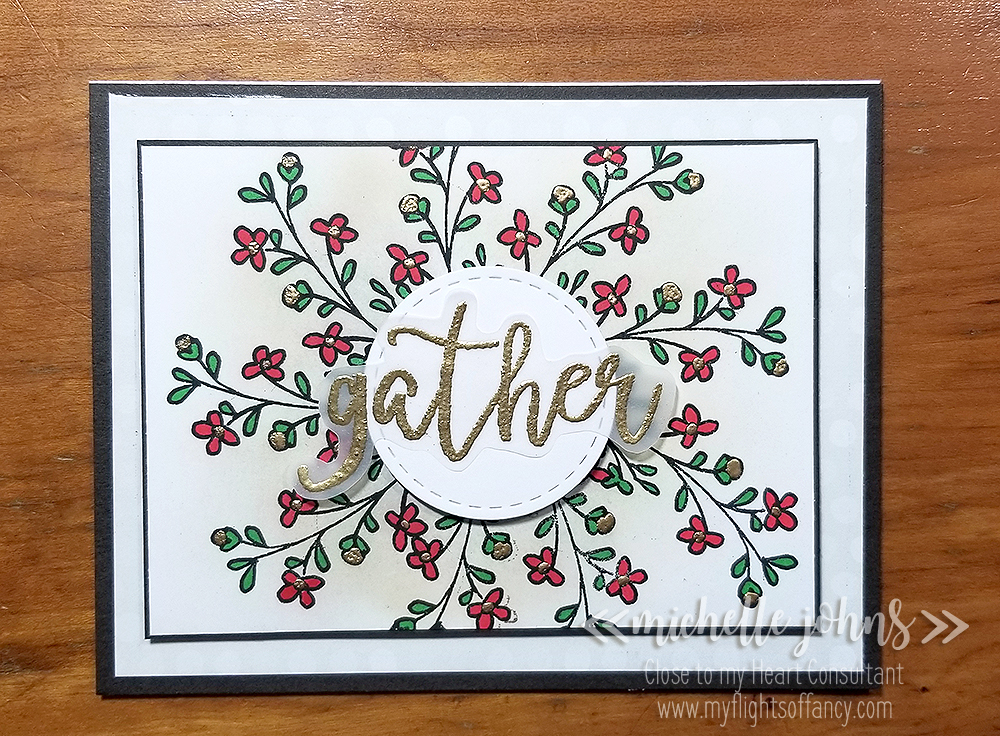
It turned out so fun!! I colored in the flower centers and buds with bonding memories glue, and then added the gold embossing powder and heat set it. I added color to the flowers and leaves with the shinhan markers.
I used one of the stitched thin cuts for the center and added the gather greeting that I had heat embossed with the gold powder o to some of our vellum, and cut out withthe micro tip scissors.
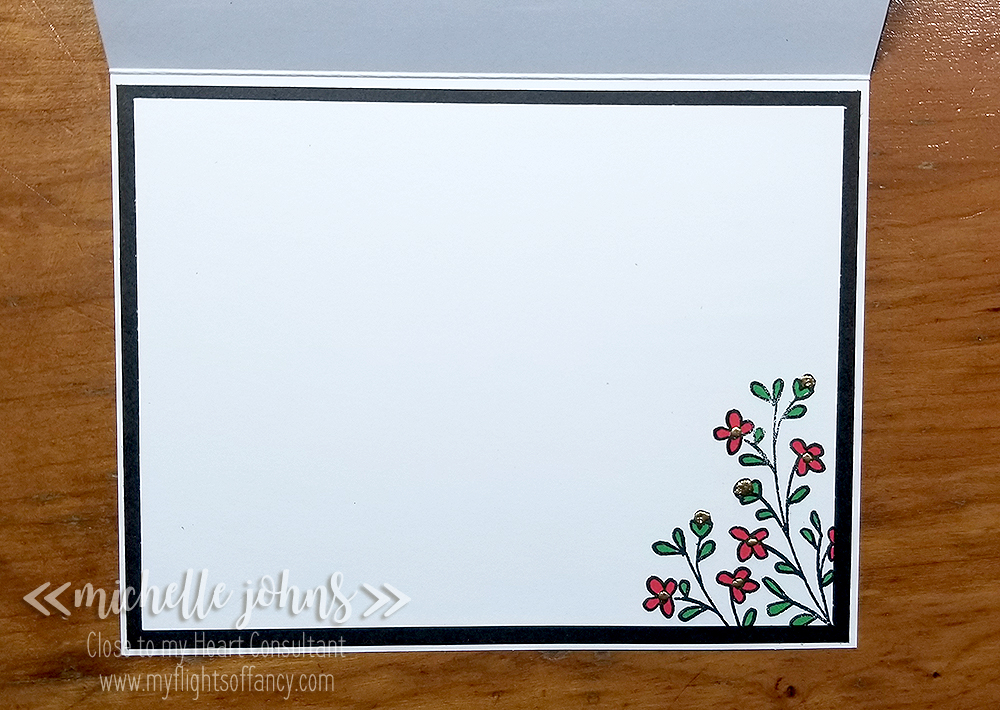
I couldn’t leave the inside blank, so I added some more of the same image, and did a bit more embossing and coloring.
I think it turned out great! What do you think? Let me know, and then hop on over to Krista’s blog!
Thanks so much for hopping by!!
Oh, and lest I forget, I am linking this up to this week’s challenge over at Heart 2 Heart challenges! It’s a photo and color inspiration challenge! You should hop over there and check it out, too!
Supplies Used:
White Cards & Envelopes Value Pack
Black Cardstock
White Daisy Cardstock
Seasonals Mix In Paper Pack
October Stamp of the Month
Archival Black Ink
Carmine Shinhan Touch Twin Marker
Vivid Green Shinhan Touch Twin Marker
Gold Embossing powder
Versamark Embossing Ink
Anti-static pouch
Bonding Memories Glue
Mink Ink
Sponge
Embossing Stylus
Stitched Circles Thin Cuts
Vellum
3-D Foam Tape
2 x 3 1/2 Acryllic Block
Fiskars Trimmer
Liquid Glass
Non Stick Micro tip Scissors
Bone Folder
Martha Stewart Scoring Board
Cuttlebug
Subscribe to my monthly newsletter & daily blog updates in the sidebar.
Join My Craft with Heart Club.
Earn FREE products by joining my Princess Club.
Check out the clearance rack and save up to 70%.
The $75 New Consultant Kit is the best deal of ALL! Discounts & benefits here.
Find me on Facebook Page where I share videos and specials
Join my Facebook Group. Prizes and fun interaction!
Follow me on Pinterest.
Subscribe to my YouTube channel with video tutorials.