Tag Archives: Thanks

Thankful

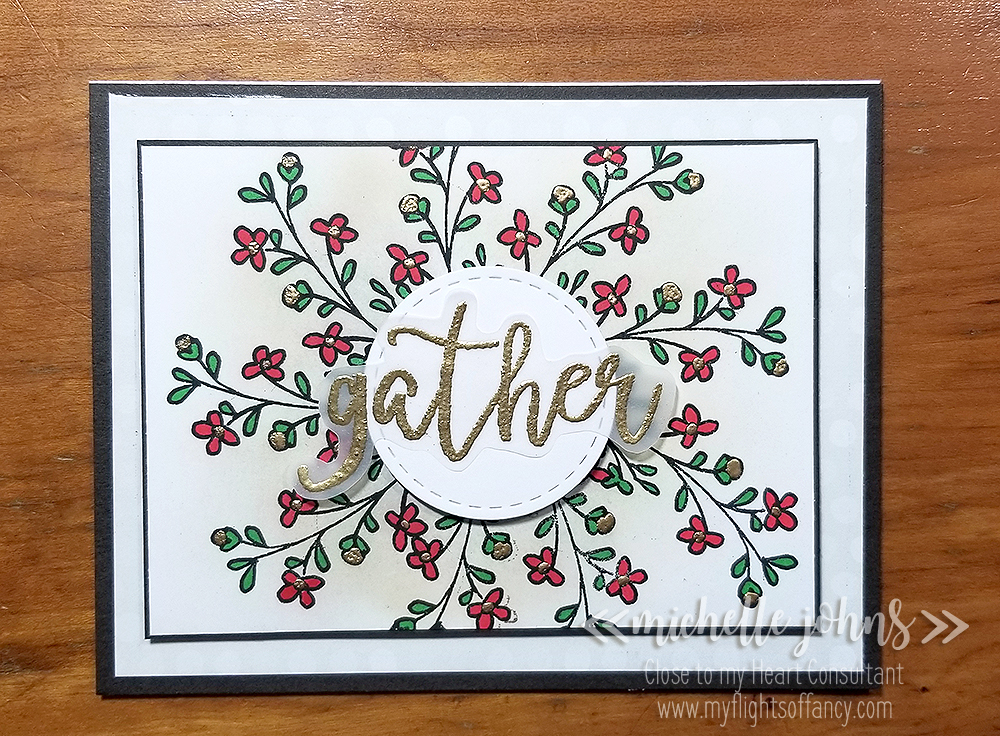
If you joined me Sunday morning, you got a chance to see me make this fun card, and even the oops that I had! If you didn’t join me, you should add me to your Sunday morning schedule, so you can watch live next Sunday, 9am Pacific time!

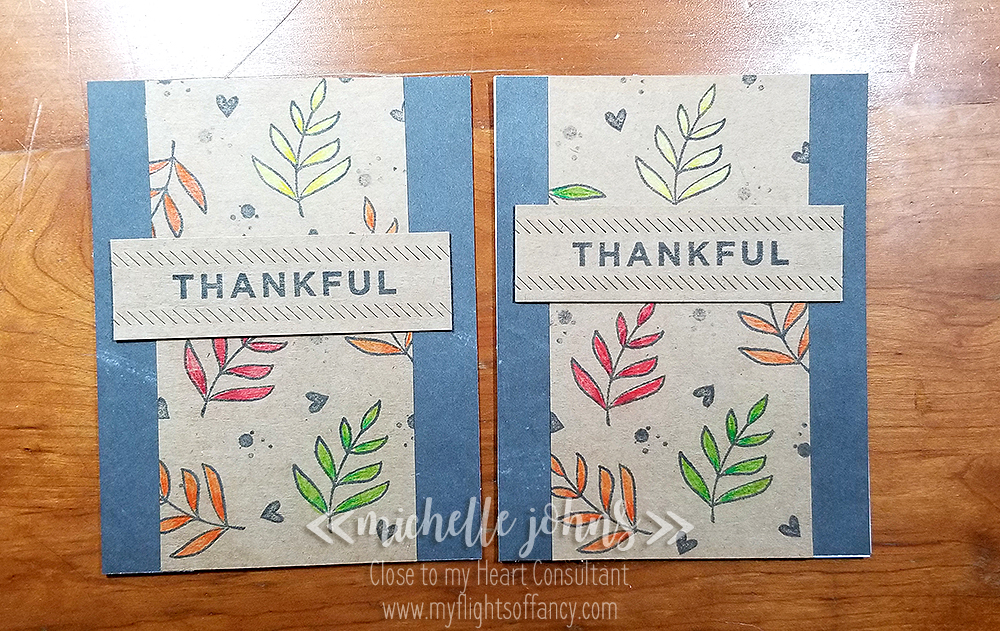
This card is fairly simple, and is completely and totally inspired by Amy Ulen’s card. When I made my sample, I couldn’t find my package of Kraft, so I had to figure out what I had that I could use to make my sample and then make another during my live video, so it’s amended from her card, but you can totally tell that it is inspired by hers!

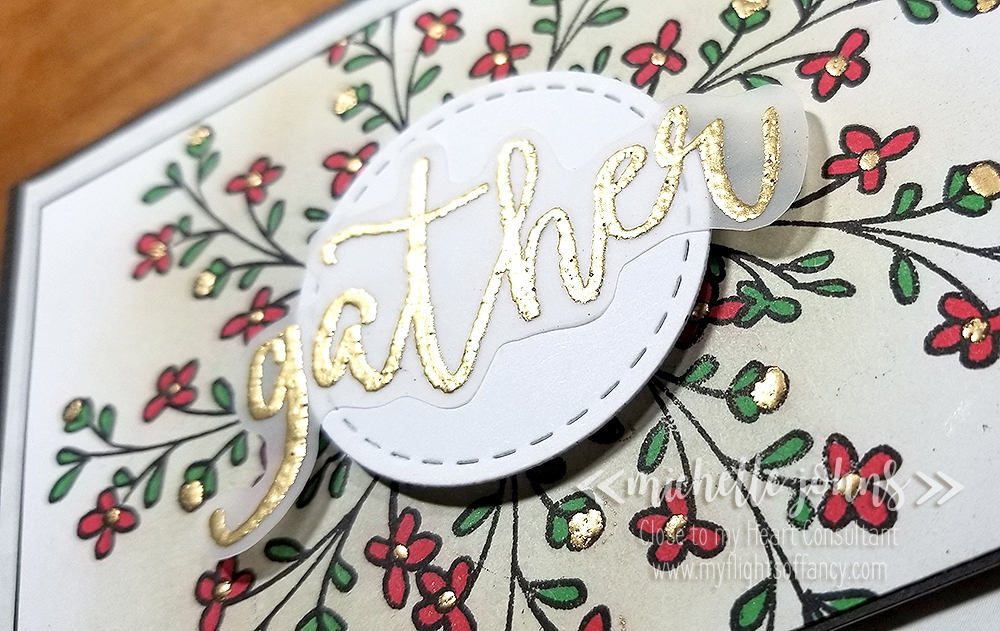
Would you believe that the bright pops of color on this card are from the new water color pencils? It totally is! I LOVE the look that this gives the card, especially on the kraft cardstock!

This card was SUPER easy to make! It doesn’t take very long, and looks fantastic! You should TOTALLY give it a try! While you are at it, link it up to the Heart 2 Heart Challenge this week, which is to use ANYTHING from the new Holiday Expressions book!

Thanks so much for stopping by today! I hope you liked my project, and I hope that you will leave a comment letting me know what you think, and also join in on the challenge at H2H, that I linked above! You have through the end of the month to play along!

Until next time!
~ Michelle

Supplies Used:

These items are linked to my store to make it easier for you to find!
Kraft Cardstock
Value Card base and envelope
Watercolor Pencils
Charcoal Ink
October Stamp of the Month
2 x 3 1/2 block
1 x 3 1/2 block
Bunches of Love Stamp set
Decorative Borders Thin Cuts
Tis the Season Paper Pack
Liquid Glass
Thin 3-D foam tape
Bone Folder

Did you enjoy what I had to share today? If so, please . . .

Subscribe to my monthly newsletter & daily blog updates in the sidebar.
Join My Craft with Heart Club.
Earn FREE products by joining my Princess Club.
Check out the clearance rack and save up to 70%.
The $75 New Consultant Kit is the best deal of ALL! Discounts & benefits here.
Find me on Facebook Page where I share videos and specials
Join my Facebook Group. Prizes and fun interaction!
Follow me on Pinterest.
Subscribe to my YouTube channel with video tutorials.

Thanks & Giving SOTM Blog Hop

Welcome to this month’s SOTM blog hop! I know you will get a lot of inspiration from everyone! Today you should have arrived from Ronda’s blog. If not, thats ok, its a circle, and you will get back to her!

I try to find things to do with the stamp sets that are a bit different than what other people might do. Today I have this fun wreath type look for my card.

It turned out so fun!! I colored in the flower centers and buds with bonding memories glue, and then added the gold embossing powder and heat set it. I added color to the flowers and leaves with the shinhan markers.

I used one of the stitched thin cuts for the center and added the gather greeting that I had heat embossed with the gold powder o to some of our vellum, and cut out withthe micro tip scissors.

I couldn’t leave the inside blank, so I added some more of the same image, and did a bit more embossing and coloring.

I think it turned out great! What do you think? Let me know, and then hop on over to Krista’s blog!

Thanks so much for hopping by!!

Oh, and lest I forget, I am linking this up to this week’s challenge over at Heart 2 Heart challenges! It’s a photo and color inspiration challenge! You should hop over there and check it out, too!

Supplies Used:
White Cards & Envelopes Value Pack
Black Cardstock
White Daisy Cardstock
Seasonals Mix In Paper Pack
October Stamp of the Month
Archival Black Ink
Carmine Shinhan Touch Twin Marker
Vivid Green Shinhan Touch Twin Marker
Gold Embossing powder
Versamark Embossing Ink
Anti-static pouch
Bonding Memories Glue
Mink Ink
Sponge
Embossing Stylus
Stitched Circles Thin Cuts
Vellum
3-D Foam Tape
2 x 3 1/2 Acryllic Block
Fiskars Trimmer
Liquid Glass
Non Stick Micro tip Scissors
Bone Folder
Martha Stewart Scoring Board
Cuttlebug

Did you enjoy what I had to share today? If so, please . . .

Subscribe to my monthly newsletter & daily blog updates in the sidebar.
Join My Craft with Heart Club.
Earn FREE products by joining my Princess Club.
Check out the clearance rack and save up to 70%.
The $75 New Consultant Kit is the best deal of ALL! Discounts & benefits here.
Find me on Facebook Page where I share videos and specials
Join my Facebook Group. Prizes and fun interaction!
Follow me on Pinterest.
Subscribe to my YouTube channel with video tutorials.

Rad Dad – Masculine Themed Optional Hop

Another hop! You betcha! This month we have a special called Dad is Rad, and it’s only available until the end of June! I know you will want to get this set, and we are here to show you some ideas other than what you get with the kit itself! They will all be masculine themed, so they are perfect for the Dads (or guys) in your life! Today you should have arrived from Darlys’ blog. If not, that’s ok, it’s a circle, so you will get back there. So, let’s get started, shall we??

First, let’s start with what you get in the Dad is Rad kit. Check this out!

This kit contents:
1 – My Acrylix® Rad Dad Stamp Set (D1811)
11 – cardstock sheets (1 Almond, 1 Crystal Blue, 1 Juniper, 1 Sapphire, 2 Toffee, 4 White Daisy, 1 gold glitter)
1 – White Burlap Ribbon (Z3323)
1 – Gold Bows (Z3380)
4 – white cards & envelopes

You will also have access (even without purchase) to a pdf guide on how to create a two page layout and 5 cards with the supplies in this kit. It really is a great deal!

Now, shall I show you what I came up with? I must tell you, I totally CASEd this card I found on Pinterest. I changed the colors so that it would use what came in the kit, and I LOVE love love how it turned out!

I stamped the solid argyle image in Almond Ink and the dotted argyle in Sapphire Ink. The “Thank you” was cut with my explore, I used the font Lobster Two. I cut it four times and layered them together with liquid glass, and attached them to the card with it as well.

I used the Almond cardstock for the background and the Sapphire cardstock to tie in the ink and sentiment.

I even brought the design into the inside of the card. I just couldn’t stop stamping it!

I am LOVING how this card looks! Super classy and very masculine! Tell me what you think!! What color combos would you use??

Now, after you comment, hop on over to Alayne’s blog and see what she has for you!

Thanks so much for stopping by!