Tag Archives: Mini Album

Home is where the Heart is

It’s a saying you hear often, right? So, wherever your love is, is where home is, right? That is the theory I am working with for this week’s challenge over at Heart 2 Heart Challenges! I have been working on a mini album, as you may know, for the trip that I surprised hubby with for his birthday a few years ago. We went to New York City, and that city hums on his wavelength.

We had so much fun there! I am so glad that we were able to do that! So, there aren’t any photos on here yet, but it is ready for the photos and the journaling! I think this might be a good page for when we were in Times Square!

Danielle and I did this layout during a zoom call for the Let’s Flock Together Facebook group. It’s a group that is participating in the #100DayProject with a video every single day!

Did you realize that Heart 2 Heart Challenges has a new challenge every week? And that you have the whole month to participate? We would love it if you came and participated with us! We are even looking for a few more people to join the design team!

Bubbling fun with a Mini Layout!

Ok, that may sound silly, but it’s what I see everytime I look at the sketch that Danielle and I are using today! Originally I think it was designed for a card, but I thought it could EASILY be made into a mini layout! So, that’s what we did!

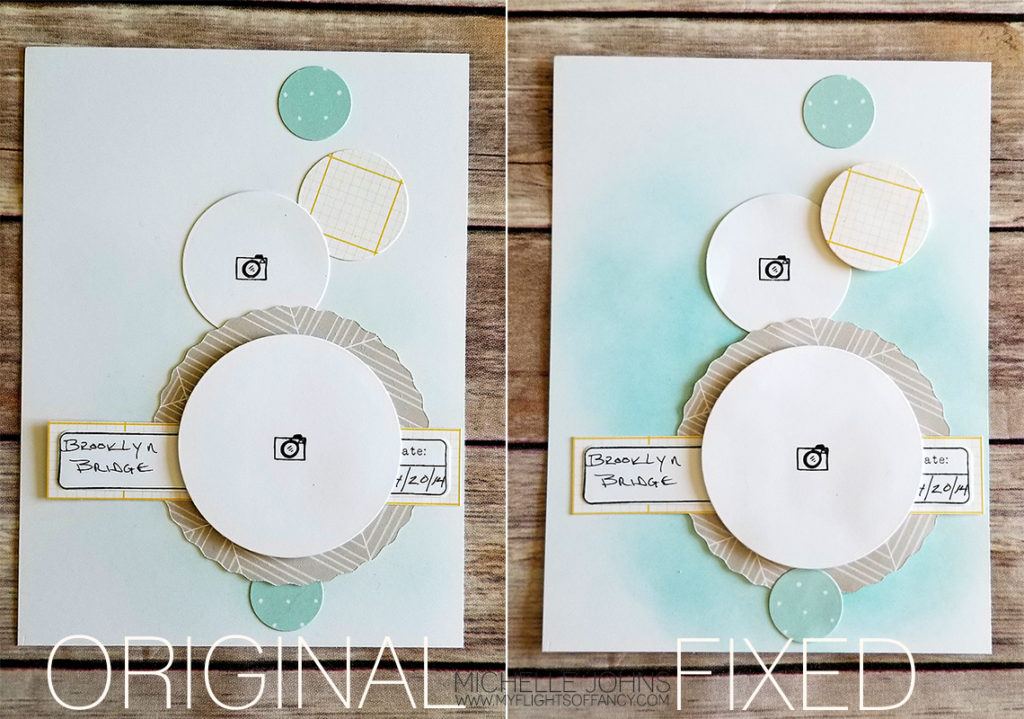
Now, this could EASILY be done with my cricut, but I didn’t want to have to pull it out and do all that, I just wanted to sit at my desk and make it happen. So, I grabbed a few different dies! I used the large scallped circle from the card spinner set, and the three smaller circles from the Basic Circles thin cut set, and the large circle from the Shaker Window set!

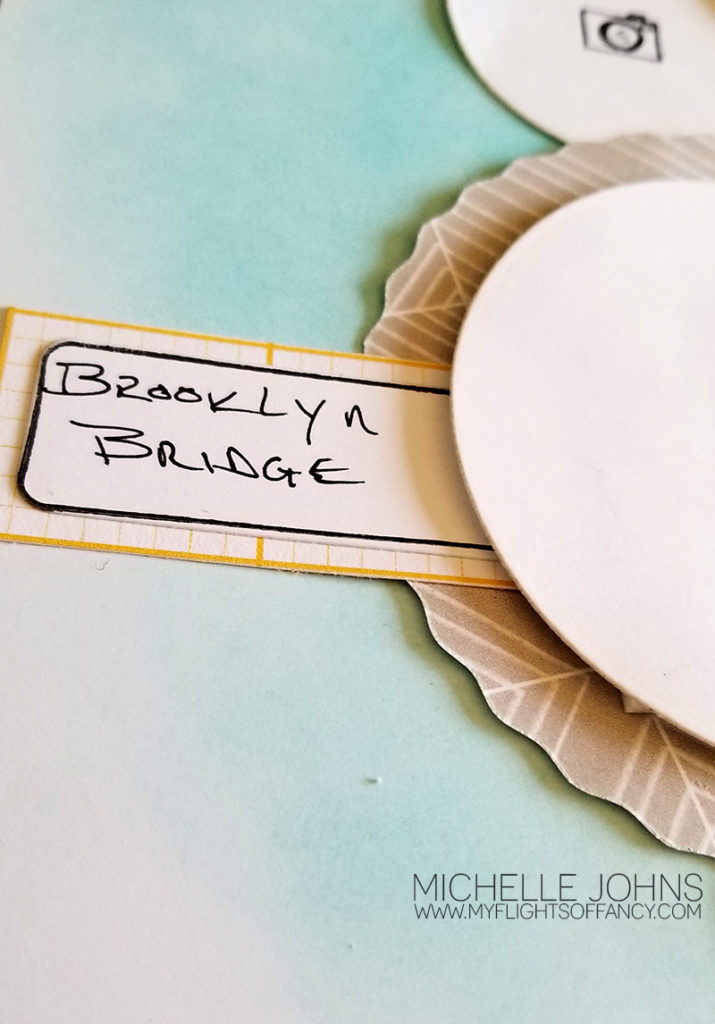
The journal box comes from the New Beginnings set, which includes a die, too! I masked off “word of the year” on the journal spot, so I could have enough room for hubby to write Brooklyn Bridge, since that is what I will be putting on this page!

All of the papers are from the Mix In paper packet, it’s so versatile! Originally I had used glacier ink to put the color behind, but that just kind of vanished in the few hours that I had put it onto the paper! ACK! So, then I tore it apart, I know none of you have ever done that before, right? hahaha!! So, then I grabbed my lagoon ink and redid the sponging to get that color behind there.

Take a look at the difference! (I made a couple of other changes too, but essentially the same) WOW!

I really like how this turned out! I used the lines on the different papers to go with all of the cables of the bridge, I thought it tied it all together, really well!

I would love to know what you think! Leave me a message below, and then hop over to Danielle’s blog to see what she came up with! (it’s adorbs, btw, in case you didn’t already know that!)

Mini Layout – choose your own adventure!

Do you remember the choose your own adventure books from when you were a kid? I always loved them. Sometimes I would cheat, but not always! LOL Well, today Danielle & I have a “choose your own adventure” type of layout, again! So, we chose this page as our inspo page. The thinking is, you could use any 4 blocks either together, or not, to create your own little mini layout page. You could do it as one single page or you could do it as one of the 3×4 page protector pages.

I chose to use the 3×4 page protector, and go from there. I don’t know if I told you my theory last week (I could go back and check, but who has time for that??), but that I had decided that I was going to try to create a mini album for the trip that Hubs and I went to NYC on. So, I am going to use all of the prompts, and I will have a finished book (and probably more than one) by the end of the year! I think I will get some journaling throughout the process from hubs too, so that it isn’t just “my” book. I will have to incorporate some pics from him, too! (yaay! more pages!) LOL

So, I started with stamping the city scape from the “Fly-by Greetings” stamp set in intense black ink. It just screams NYC to me! Then I colored it with the tri-tip markers. I didn’t get the banner ropes quite masked off, but I still am very happy with it! (excuse the cat hair! I didn’t notice until after I posted!)

Then I needed the pocket for the top right, that will hold a 2×2 photo on top, then I can put some journaling on the little tag. I did cut the page protector so that the tag will pop out easily! I used a little 1/8″ punch for the hole and a bit of mink twine.

The bottom right will be for a photo that is either 3×4, or maybe slightly smaller, so that I can have the white border.

Then, the bottom left is a little pocket card. You can see the blue/white circles (it’s the same paper from the last page!) sticks out over the photo spot. It’s tucked in a vellum pocket! I know you can’t tell very well just yet, but when the journaling/photos are on there, you will be able to see the difference! The heart stamp is from the Love These People stamp set! I thought it fit perfectly!

I am so happy with how this turned out! (Even if I did have to remake the vellum pocket and tag, because I didn’t pay attention to how my page protector was laid out…) I hope you like it too, and that you are a bit inspired by it! Make sure to hop over to Danielle’s blog to see what she came up with! (A little birdie told me she used the same stamp set that I did!)

CTMH Items used:
White Daisy Cardstock
Mix In paper packet
Vellum
Fly-by Greetings Stamp Set
Love These People Stamp Set
Intense Black Ink
Spectrum Noir Tri-Tip Markers
Raspberry Ink
Stitched Rectangle Thin Cuts
Mink Twine
Foam Tape
Non stick Micro-tip Scissors
Paper Trimmer

Mini Wednesday!

Welcome back to another Mini Wednesday! Danielle and I are at it again! (you knew we would be, right?)

Today I chose this page to do a “choose your own adventure” type of page! There are so so so many options! I went with two 4×6 pieces, that will go in a page protector that is made for that. (I photographed them outside of it, as it’s easier to photograph!)

For the top piece, I use a piece of the Spruced Up B&T. Aren’t those trees just adorable? I found a piece of scrap vellum and stamped “grateful”, from the Say It In Style stamp set, in espresso ink and used my hair dryer to help the ink dry faster. I just glued it to the back side of the B&T. It will lay flat when it’s in the protector, no need for any other glue! My photo will be 3 1/2 x 3 1/2.

The bottom piece is the same piece of B&T, but the back side! This will be for journaling, but another photo could easily be added!

Super fast, super simple, and I have another page done!

I would love for you to pick and choose some of your own adventures, and make sure to share them with us!

Make sure to check out Danielle’s page too!

Wednesday is Mini Day!

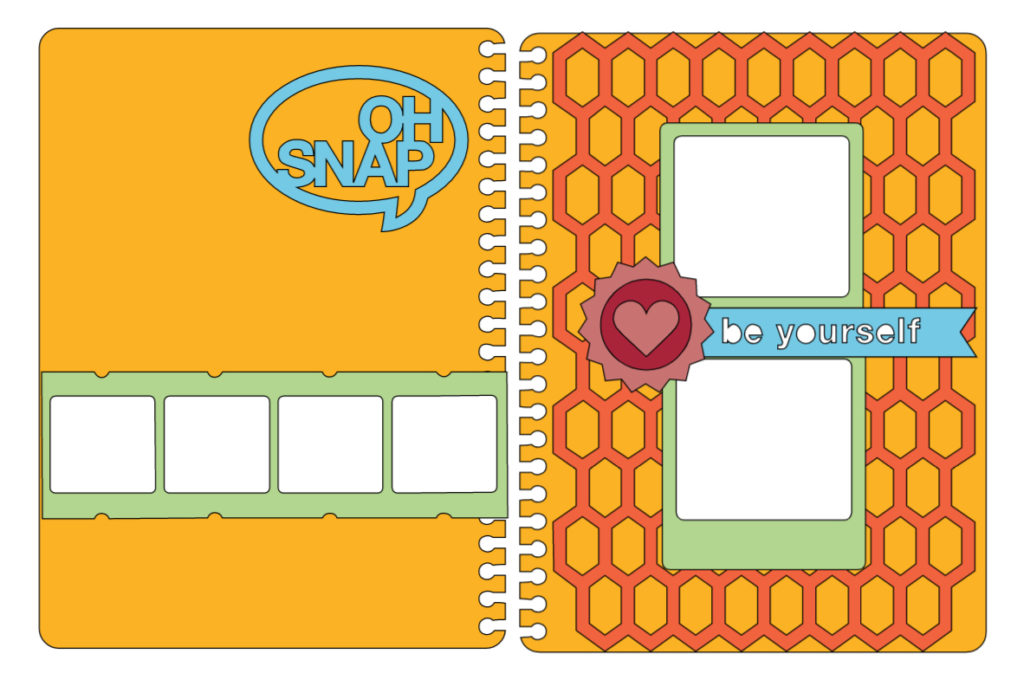
Hey everyone! Welcome back to another Mini Wednesday! As you have seen the last few weeks, on Wednesday, Danielle and I are challenging each other (and all of you) to participate in a sketch challenge! Well, today, we went a slightly different route! Danielle chose a mini album page straight off the Artbooking cartridge! Perfect! I love using my cricut!

And then, my computer and design space decided they weren’t going to play nice together! Whaaaaaa?!?!?! Sooo, she suggested that I go with using it more as a sketch, and not use my cricut. So, that’s exactly what I did!

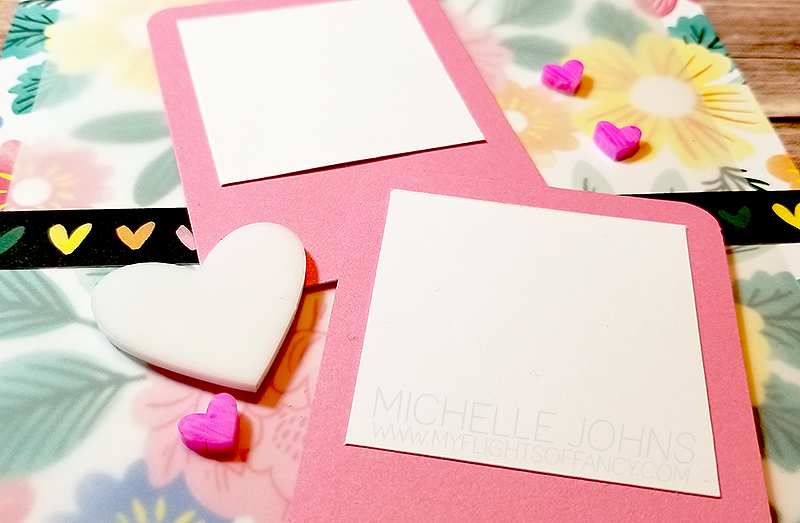
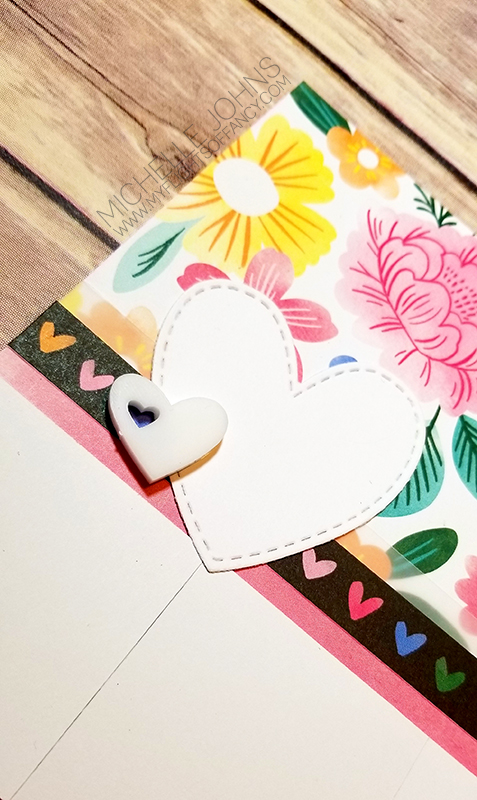
In place of the honeycomb, I used some vellum to tone down the floral paper from the Celebrate Today paper packet, just a smidge. I used pixie cardstock for some ‘Polaroid’ frames. Those acrylic hearts . . . don’t you just love them? I used the bright pink marker to give them a pop of color against the background.

On the left page, I again used some vellum, but ran it horizontal, and the backside of the flower paper is a pink wash, and I used that to help the photos pop against the background. A quick heart from the stitched hearts die, and this page is done!

These pages went together in less than an hour, even with the coloring! It was so awesome! I love it when things are easy and fast! Especially when they turn out this good!

I would love to see what you come up with for this week’s sketch! I do hope you will share with us! If you didn’t yet, hop on over to Danielle’s blog to see what she came up with! It is super cute!

I look forward to seeing what you guys do with this one!

Until next week!

Stay Crafty my friend!

Mini Album Challenge, week 2!

Welcome back to the 2nd week of the Mini Album page challenge! Danielle and I are at it again with this weekly sketch challenge! We are having a LOT of fun with this, and we hope that you are enjoying seeing what we come up with each week!

Today we are working with this sketch.

For these challenges, we are picking a sketch, and we are working on them separately. That way you get two different ideas (in theory, at least!) for the same sketch! (in this case, if you follow the pin, there are even more ideas for this sketch, on multiple days)

Today I used the Spruced Up papers to make this fun little mini layout. the flip flaps allow me to add more photos to this small page! I just love how easy they are to add to the page protectors!

(I’ve found that it’s really hard to photograph pages in page protectors! Sorry!)

Now, I have actually created a cricut file for this page! You can find it here: Week 2 Sketch

This week I have a quick process video for you, the sketch is pretty simple, so I didn’t give any measurements, but it’s easy!

I hope you enjoy!

Remember, go over and check out the page that Danielle has for you! We would LOVE to see you participate! Let us know if you play along with the same sketch!

FBL: Into the Wild Mini Album ~ Completed!

On Sunday’s FB Live, we finished putting together the Into the Wild Mini Album! I need to order an actual album for it now! (There are a few more options coming up in the new book!) It was so fun putting it together!

The only thing that I did “off camera” was to cut the cut apart sheet pieces and die cut some of the shapes from White Daisy Cardstock. Everything else was the same as it was left at last week!

The items for this album will be retiring on Saturday, so make sure to get them before they are gone! As I said last week, there are a few options on how to get your hands on this fun-ness! Let me know if you would be interested!

I did make a quick walk through video, so that you can see the whole thing finished! Click here to see that!

To follow along with the making of the album, you can click here for part one, and click here for part two!

I hope that you enjoyed this little mini album! It was fun to make!

Thanks for joining me!

FBL: Into the Wild Mini Album

Sunday we started working on another mini album! I had the pieces pre-cut for this, I thought I might be able to make it through in one go, however I forgot my laptop charger, so I ran out of battery! Oops!

So, we will have part two to finish the base pages and do the embellishing next week, so you will want to make sure to come back!

I will have a few options for you! You can purchase the pre-cut kits from me for $45, or you can place a $50 order on my website, and I will send you the cutting guide, and you can cut the pieces yourself. (add on the SOTM for $5 and I will also send you the August SOTM kit free as well!)

Check out the video here.

I, of course, had to make a few changes, but they aren’t many, and they flow well with the album!

The things that you will need for this mini album are:

Into the Wild WYW Kit
Into the Wild Scrapbooking Stamp Set
6×8 Page Protectors
4×6 Page Protectors
3×4 Page Protectors

Plus, of course, glue, foam tape, & scissors.

Adventure Awaits with H2H

Are you ready for another Adventure? I know I sure am! At the beginning of the summer, Audrey went on a trip with one of her good friends, and they camped for a couple of nights at Crater Lake. It’s a beautiful spot in Oregon, with a gorgeous lake, and a hike around the bowl, and so many beautiful sights to see!

When they got back into cell range, she sent me a few photos, and I knew I needed to scrap them! So, I went back to the mini album idea, I’m thinking she will like it, at least, I hope she will! The Cricut You Are Here bundle have some GREAT stamps for travel! (not to mention some great cuts, too!)

I started with a New England Ivy cardstock base, and realized that it was too heavy. So, I added a bit of the wood grain paper from the Into the Wild paper packet at the top of the page. I left the green at the bottom because A. it was a bit heavier, and B. it would work well with the trees that are in the photo.

I stamped 4 of the images on white daisy in archival black ink, and then decided that the road sign needed to be green instead. So, I restamped it in Fern ink. I wanted to put a little something over the photo (once I get it printed), so I used a bit of vellum and stamped on it with the archival black ink. I used two different stamps to get the sentiment that I wanted.

I wanted the wifi stamp on there since there was zero cell service up there for her. So I stamped it in second generation charcoal ink, right onto the wood piece. I haven’t printed the photo yet, but this is the photo that will be going onto this page!

This will be an awesome page, won’t it? She sent me a few photos, so I might add a few flip flaps to put other photos and a journaling spot for her. I did stamp the little ‘you are here’ markers from the Escape to Paradise stamp set and thin cuts in sapphire, lagoon, and candy apple red to put a marker on the photo, but since I don’t have it printed yet, I don’t know which would look best. So, I have them attached to the back of the page with a bit of washi tape!

Thanks so much for stopping by! If you had this page, what photo would YOU put on it? Leave a comment and let me know!

All products used are CTMH unless otherwise noted:

You Are Here Cricut Bundle
Into the Wild Paper Packet
White Daisy Cardstock
New England Ivy Cardstock
Archival Black Ink
Charcoal Ink
Fern Ink
Vellum
3-D Foam Tape
Liquid Glass
2 x 3 1/2 Clear Acrylix Block
1 x 3 1/2 Clear Acrylix Block
Fiskars Paper Trimmer

Celebrate Good Times at H2H!

This week we are celebrating! All those good times!

Today I have a fun mini page for you. This is a 6 x 8 page perfect for our mini album binders. Some of these papers might be hard to place, and that’s because they aren’t going to be where you look for them! The Hearts paper is from the Mix In Packet that is retiring in August. That fun striped paper? Would you believe it is the paper that is included in the Stories by Stacy Short Story Workshop? I had a bit of it left over that I haven’t used up yet! I thought it added the perfect pop of color on this page! I also used a tiny bit of scrap from the True Love paper pack for the sapphire topper on the journal spot.

There will be a photo at the top (obviously, right?) that will be of the gifts that we will be bringing to the nurses at Randall Children’s hospital for Audrey’s 1 year anniversary of her “got rid of me day”!

There is a little spot on the bottom right for some journaling about the day.

I used the Simply Said alphabet for the date that will go over the photo, and use the Sweet Girl Scrapbooking set for the line of dots on the date and the journal card, and the little sentiment on the left.

I really like how this page turned out! It’s not super busy, but it will be perfect for the day! And, should I need, I can add some flip flaps to the page as well, to add more photos!

All products used are CTMH unless otherwise noted:

Mix In Paper Packet
True Love Paper Packet
Story by Stacy Short Story Workshop
White Daisy Cardstock
Sapphire Cardstock
Archival Black Ink
Sapphire Ink *photo shows old style pad
1 x 3 1/2 Clear Acrylix Block
Fiskars Paper Trimmer