Tag Archives: Embossing

I like to move it, move it!

Hey Friends!  It’s the first Monday of the month, which means that there is a new challenge over at H2H!  This one is all about things that move!  Cards, scrapbooks, and any other crafty project!  I made this super fun and adorable card with a few new products!  Let’s take a look, shall we?


Floating Mouse

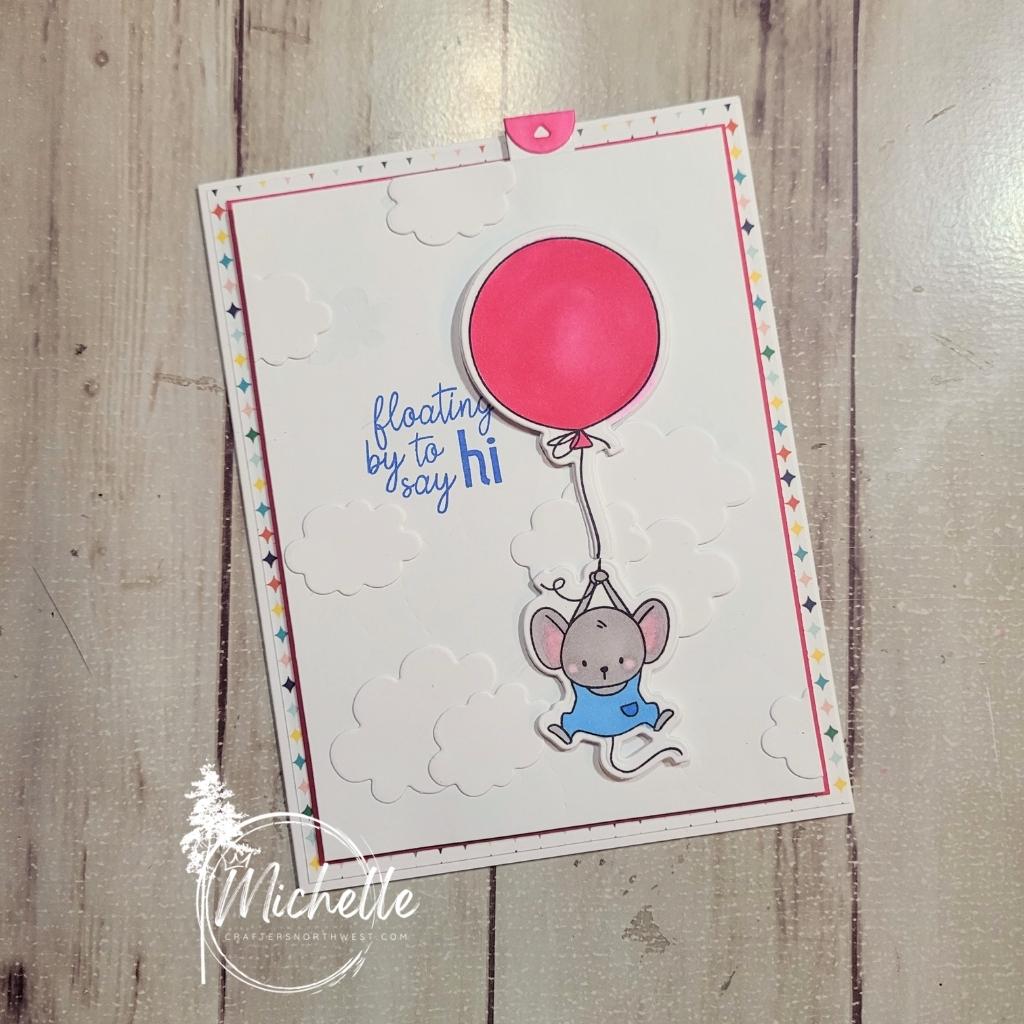
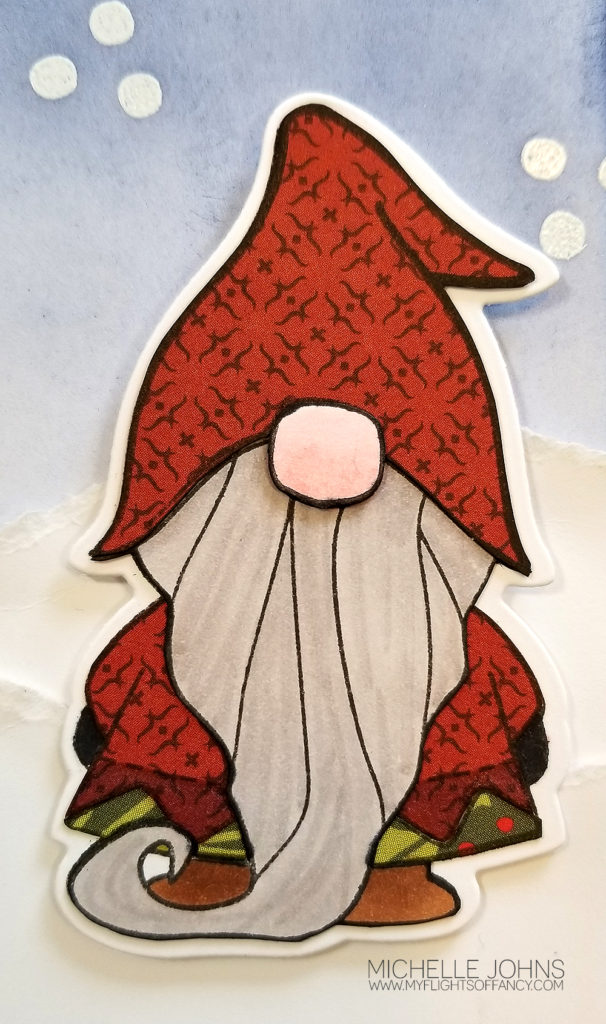
I used the Brights paper pack, that is available in the Flash sale happening until the end of the day, today.  I paired it with some white daisy cardstock (you can never go wrong with that!) and some Raspberry cardstock.  Add a few Triblend markers to the mix (True Blue Blend, Pale Pink Blend, Magenta Blend, Brown Grey Blend, Light Green Blend, and the clear Blender Pen) and you can’t go wrong!

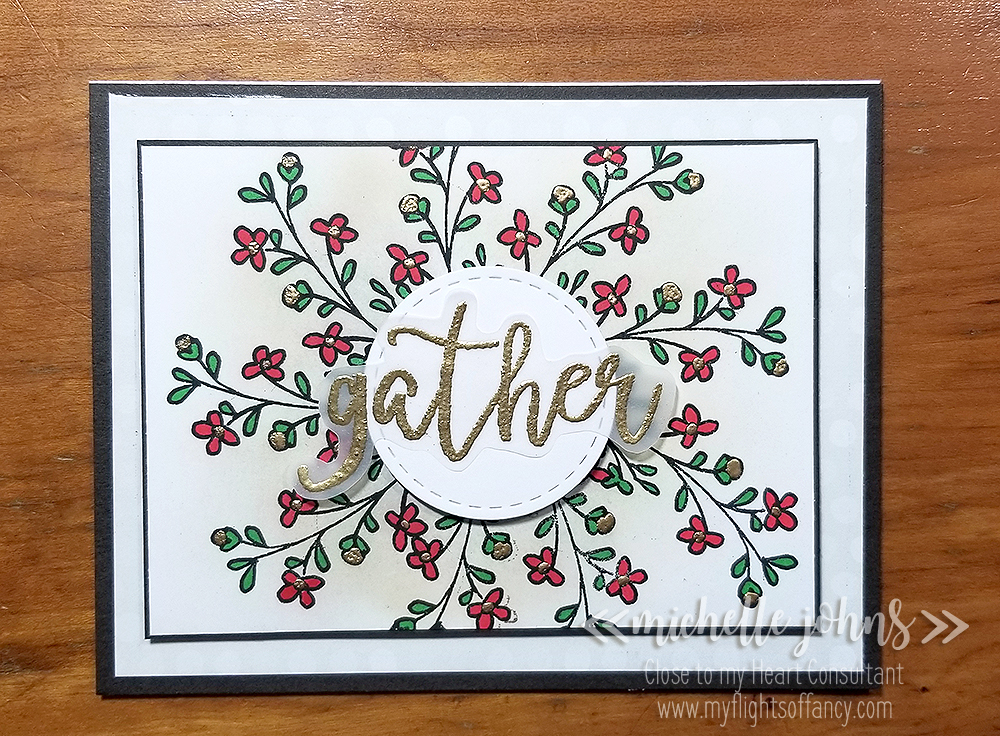
I used a few of the new things with the National Stamping Special, and it turned out super cute!  I will list all the items below, so you can grab them too, if you would like!


This new pull tab option is a thin cut that we now carry!  Isn’t it great?  It just makes this card so fun for the recipient!


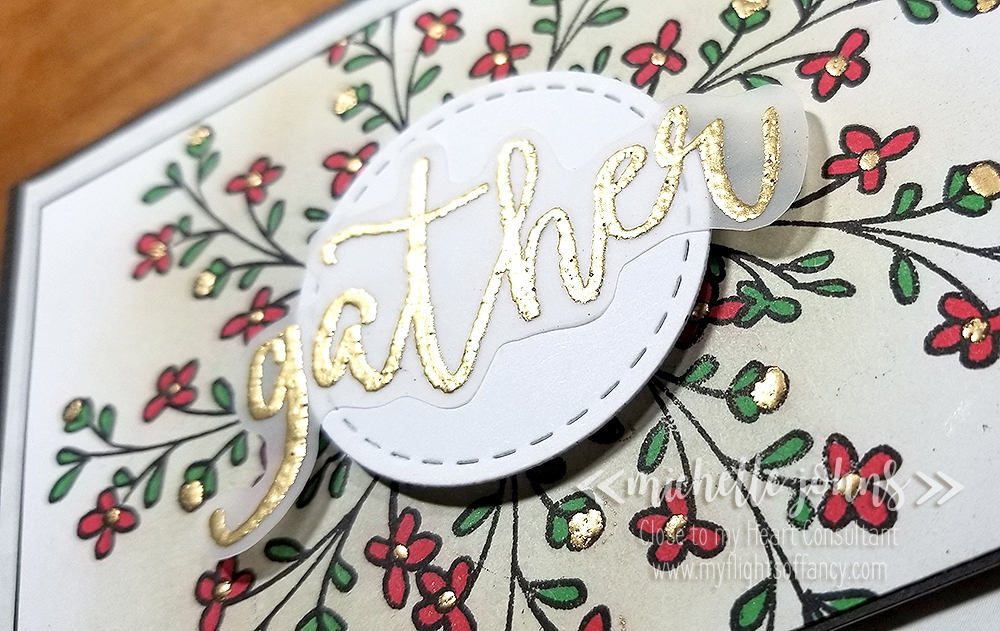
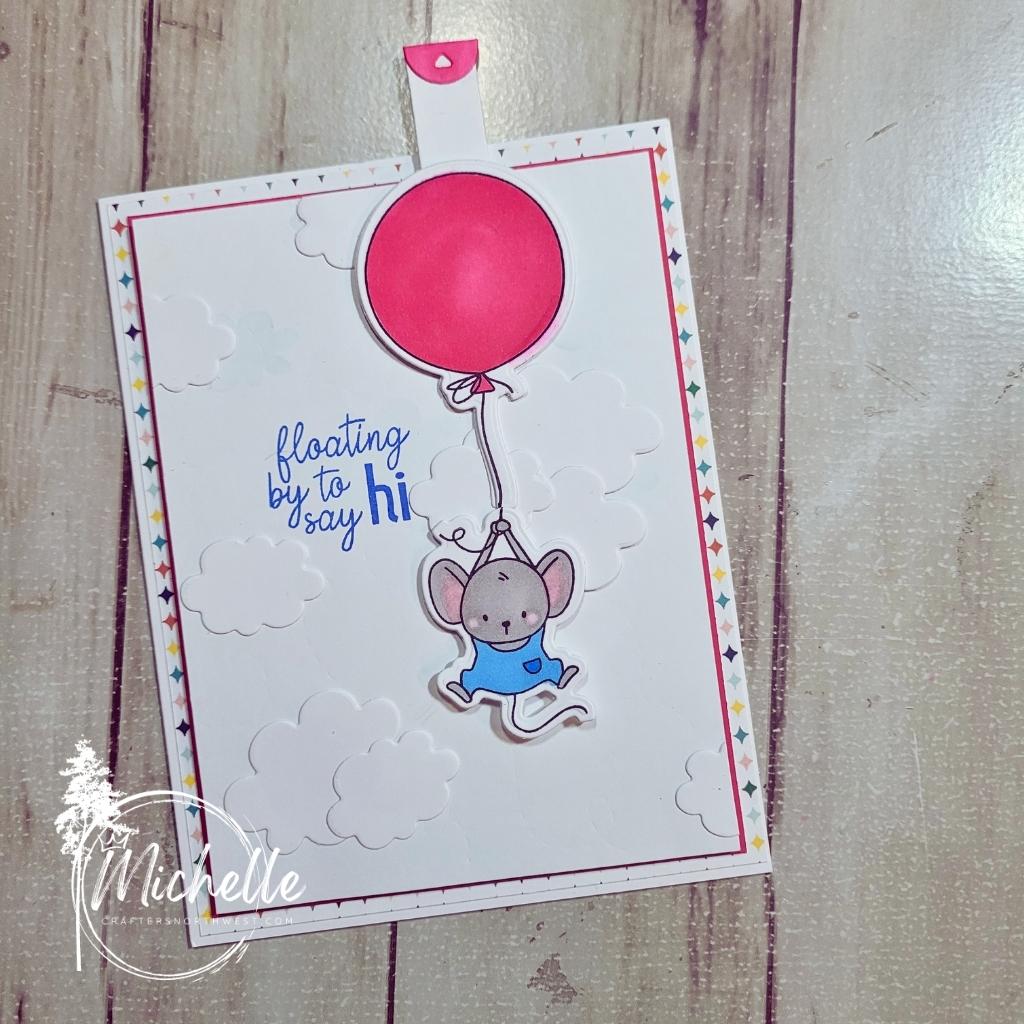
Here you can see a few different things.  The background die that I embossed instead of cut, the cloud stencil that is super light in the background, and the cloud die cuts that are from the cloud background die.  All of these, along with the mouse and balloon are part of the National Stamping Month special!  The pull tab thin cut is in the new core book!  I can’t wait to show you more things coming from it!  There are SO MANY THINGS!!


Thanks so much for stopping by!  I would love it if you left a little love before you left!


CTMH items used:

H2H’s Peace on Earth

This week’s challenge over at the H2H blog is “Peace on Earth”.  This was a hard one for me, at first, because I don’t have any nativity type stamp sets.  So, I had to do some thinking as to how to make that work.  I think I succeeded!  🙂

I grabbed a piece of the watercolor paper, and decided to do a slimline card.  I cut my piece down to 3.5 x 9, and then started ink blending.  I used mostly our water based inks on here, however did not add any extra water.  I used: Glacier, Bluebird, Peacock, Sapphire inks, and then completed the blending with some black soot distress oxide.

Once I finished with the blending, I grabbed my clear shimmer brush and created some splatters, and then added some white dots with a white gel pen.  Next up was some snow banks, made easy with the fancy borders thin cuts and some white daisy cardstock!  I used some thin foam tape behind the top of the hills, and glued the bottom of the hills flat.  It gives it such a unique look!

Once I was done with that, I decided I needed something else for the card.  I couldn’t find a sentiment that was small enough, and understated enough for the card.  The first star I was going to go with, wasn’t quite big enough.  It got lost with some of those larger spots of shimmer brush.  But, I started thinking outside of the box, I mean, that IS how the whole thing got started, right?  I found this fairly perfect ‘star’!  It is actually the asterisk from the Brushed Letters Alphabet!  Stamped it with versa mark ink, and heat embossed it with some silver embossing powder.

I really love how this card turned out!  I hope you like it as well!  I would love to hear your thoughts, should I have stuck with the silver, or should I have gone with gold for the star?  

CTMH Items used:


I look forward to hearing from you all!  Thanks for checking out my card!  

Until next time!

H2H’s New To You

Welcome to another weekly challenge hosted over at the Heart 2 Heart blog! This week is all about what’s new to you! And the majority of this card is all NEW TO ME!

Isn’t this card just adorable? I LOVE this little guy! So, I started by die cutting the gnome (From Garden Gnomes) twice, and then stamping with intense black ink. I also stamped him on the red pattern paper from the Comfort and Joy, and on the mistletoe paper (for the bottom of his parka). I let those dry while I moved onto the next step.

Next I used chipped sapphire distress ink with the ink blending tool to create the background for this cute guy! Then I took my card base, and again used the chipped sapphire distress ink for the edges, and went lighter on the ink the further down I went on the card base. Then I used the black soot distress ink to start at the bottom of the card base and work up, blending the two colors together.

While those were drying, I grabbed a few tri-blend markers and colored in the beard, nose, gloves, and boots on one of the stamped die cuts. (I’ll list them below) I cut out those pieces. I then cut out the pieces stamped on the B&T papers (the pretty ones). I used my liquid glass and glued the pieces, layered, onto the other stamped gnome!

I used the three dots to simulate snow falling, and stamped with versa mark ink and covered that with white embossing powder. The heat gun made quick work of the heating of those, and they popped quite nicely against the distressed background! I popped that up over the card base with some 3-d Foam tape.

Next I used a piece of white daisy cardstock, and tore it twice to get the fun snow hills behind my gnome! Pop up Mr. Gnome with some thin and regular 3-D foam tape!

Viola! Our card is DONE! I love the little gnomie! I didn’t add a sentiment, but can do that inside, or add a flagged sentiment later when sending it.

What papers do YOU think would be fun to use for his hat and parka? I would LOVE to know!

Thanks for stopping by! I do hope you play along with the H2H challenge!

~ Michelle

CTMH Items used:

Comfort & Joy paper packet
White daisy cardstock
Intense Black Ink
Chipped Sapphire Distress Oxide Ink
Black Soot Distress Oxide Ink
Versamark Ink
White Embossing Powder
Black Marker
Earth Brown Blend
Pale Pink Blend
Yellow Green Blend
Brown Grey Blend
3-D Foam Tape
Thin 3-D Foam Tape
Liquid Glass
Non Stick Microtip Scissors
Mini Ink Blending Tool

April 15, 2020 Technique Hop – “Heat It Up!”

Welcome to the technique log pop! Today you should have arrived from Lauren’s blog, however if you started here no worries, it’s a big circle and you will make it back there.

Today in the Let’s Flock Together Facebook group, we played with heat embossing. I have a number of samples that I show you how to do on video, and it was a lot of fun!

Today’s card uses just one of the examples of how you can use heat embossing in different ways. And this one was a crafting oops! (But I LOVE how it turned out!)

I used the silver embossing powder and did 3 layers, and tried stamping the hello, to press it into the heated powder, however, it wasn’t thick enough yet. So, I added a few more layers, and it half worked. I had more pressure on the O than I did the H, so I heated it up, and was going to stamp it again, and when I did that, the powder became smooth, and the stamped Hello turned black! I LOVE LOVE LOVE how this turned out! Crafting oopses are fun sometimes, right?

I used pattern 20 from the MIFYH Volume 4 book, and this card came together in no time at all! (It’s taken longer to type the blog post than it did to make the card! LOVE that!)

I hope you like my little discovery! I would love it if you left a note below, before you hopped along to Miss Carrie’s blog!

Oh, and by the way, this is what it was SUPPOSED to look like! LOL!!

Thanks so much for stopping by!

~Michelle

10 things mini

So, Danielle and I decided to do a 10 things layout. And, we both . . . kind of . . . have pockets on our pages. . . sort of. . . LOL!! I designed mine in design space, and then ended up not using that at all, but I wanted to keep some of the feel of it! We went off of this page as our inspiration.

I went ‘old school’ and every stamp on this page is retired. (sorry, not sorry!) I started with some sapphire cardstock, and stamped my NYC in Rustic Alphabet with versamark so that I could use the gold glitter embossing powder! It really does shimmer when it moves! Then I used Jennifer’s Hand with the versamark and white embossing powder. The little heart came from the Share the Love set, and I used the versamark and white embossing powder on it too. (The camera image comes from that same set)

To add some “stars” to the background, I used the Ink Blot set and the versamark ink with the gold glitter embossing powder.

I used one flip flap that was 3×4 and 5 that were the 2×2 size. I cut my cardstock to the right sizes and added the numbers. I haven’t decided if I am going to stick with just words for the numbers, or try to do some photos too!

Now, hop on over to Danielle‘s blog and see what fun stuff she has come up with! (I know she has a video for you too!)

MCM: Thank You

Today is an easy project, and could be used with any color combination that you might have or want to use! I used Sapphire cardstock and ink today, however, use what works best for whomever you are giving your card to!


{If you cannot see/watch this video, click here to watch it.}

You could even make up a whole set of these with different sentiments on there!

I hope that you liked today’s card!

The items needed for today’s card are listed below.

White Daisy Cardstock: 3 x 4 (qty 2)
Sapphire Cardstock: 3 1/4 x 4 1/4 (qty 2)
White Value Card Base & Envelope
Sapphire Ink
Clear Embossing Powder
Into the Wild Scrapbooking Stamp set
Thank You Badge Stamp set

Thanks & Giving SOTM Blog Hop

Welcome to this month’s SOTM blog hop! I know you will get a lot of inspiration from everyone! Today you should have arrived from Ronda’s blog. If not, thats ok, its a circle, and you will get back to her!

I try to find things to do with the stamp sets that are a bit different than what other people might do. Today I have this fun wreath type look for my card.

It turned out so fun!! I colored in the flower centers and buds with bonding memories glue, and then added the gold embossing powder and heat set it. I added color to the flowers and leaves with the shinhan markers.

I used one of the stitched thin cuts for the center and added the gather greeting that I had heat embossed with the gold powder o to some of our vellum, and cut out withthe micro tip scissors.

I couldn’t leave the inside blank, so I added some more of the same image, and did a bit more embossing and coloring.

I think it turned out great! What do you think? Let me know, and then hop on over to Krista’s blog!

Thanks so much for hopping by!!

Oh, and lest I forget, I am linking this up to this week’s challenge over at Heart 2 Heart challenges! It’s a photo and color inspiration challenge! You should hop over there and check it out, too!

Supplies Used:
White Cards & Envelopes Value Pack
Black Cardstock
White Daisy Cardstock
Seasonals Mix In Paper Pack
October Stamp of the Month
Archival Black Ink
Carmine Shinhan Touch Twin Marker
Vivid Green Shinhan Touch Twin Marker
Gold Embossing powder
Versamark Embossing Ink
Anti-static pouch
Bonding Memories Glue
Mink Ink
Sponge
Embossing Stylus
Stitched Circles Thin Cuts
Vellum
3-D Foam Tape
2 x 3 1/2 Acryllic Block
Fiskars Trimmer
Liquid Glass
Non Stick Micro tip Scissors
Bone Folder
Martha Stewart Scoring Board
Cuttlebug

Did you enjoy what I had to share today? If so, please . . .

Subscribe to my monthly newsletter & daily blog updates in the sidebar.
Join My Craft with Heart Club.
Earn FREE products by joining my Princess Club.
Check out the clearance rack and save up to 70%.
The $75 New Consultant Kit is the best deal of ALL! Discounts & benefits here.
Find me on Facebook Page where I share videos and specials
Join my Facebook Group. Prizes and fun interaction!
Follow me on Pinterest.
Subscribe to my YouTube channel with video tutorials.